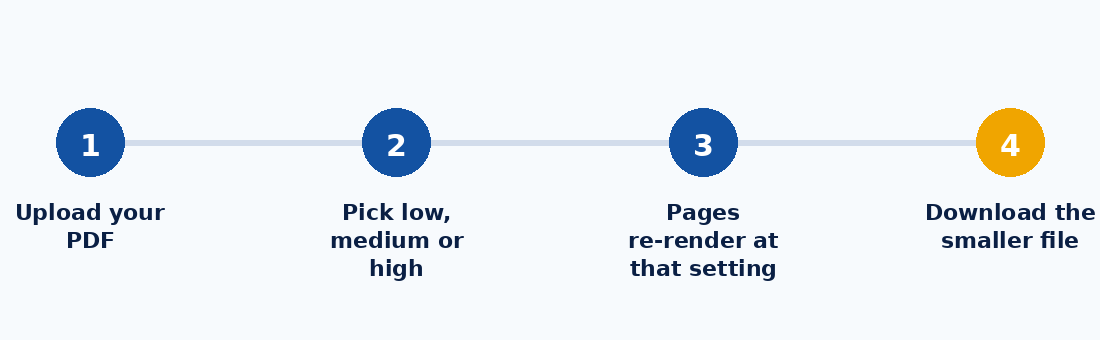
Most PDF compression works by finding the parts of a file that are larger than they need to be — usually images — and re-encoding them at a smaller size. The trade-off is always between file size and visual fidelity, so "without losing quality" really means finding the setting where the loss is invisible for how you plan to use the file.
What each compression level is really doing
When you compress a PDF, the tool typically re-renders each page and re-saves it at a chosen resolution and image quality. A lighter setting keeps resolution high and barely touches image quality, so the file shrinks only a little. A heavier setting lowers resolution more aggressively, which shrinks the file a lot but can make small text or fine lines look soft.
Choosing the right level
- Low compression — best for documents you'll print or that contain detailed diagrams and photos. Expect a modest size reduction.
- Medium compression — the right default for most everyday sharing: contracts, reports, and scanned forms sent by email.
- High compression — use when the file only needs to be readable on screen and the size limit is tight, such as an email attachment cap.
A quick way to check the result
After compressing, zoom in on a page with small text or fine detail. If it's still legible at the zoom level you'd actually use, the setting worked. If not, step down one compression level and try again.
KhanxTools' Compress PDF tool lets you try all three levels instantly and compare the resulting file size before you download, entirely inside your browser.